To start off the new year, I thought I'd do a walkthrough/ tutorial on a kanzashi flower clip I made as a gift last week. A while ago, I purchased a couple of DIY kanzashi sets online because the model flowers were so pretty. Here's what I received and what I ended up with:
This was my second attempt at making kanzashi flowers. The first one I made looked bad... I didn't know what I was doing with this one too, so today's post is probably more of a rough walkthrough at what I did than a tutorial.
Either way, the package I ordered came with no instructions and I couldn't find anything on google that didn't require sewing (because I was dead set on just using glue 😤), therefore, I thought I'd note down my process for anyone who needs a bit of guidance.
 |
| Package contents |
Kanzashi Flower Clip Materials:
- x19 pink fabric squares (3cm wide)
- x2 green fabric squares (3cm)
- x5 pink patterned fabric squares (4cm)
- x5 white fabric squares (4cm)
- x1 white felt circle (3cm diameter)
- x1 white felt circle (3.5cm)
- flower stamen, or something for the flowers' centre, like a bead
- a clip, or whatever you want to attach your kanzashi flowers to
- a pink ribbon (optional, for covering the clip)
- white string (about 50cm)
- x3 bells
Tools:
- scissors
- hot glue gun, but feel free to use an alternative
- tweezers
Steps
 |
| The pink dot will fold over to the blue dot. |
Kanzashi Flower Petals
1. Wrong side up, take a 3cm pink square and fold the top corner down towards the opposite corner. The wrong side of the fabric is the side that will become hidden. If both sides of the square look the same, then it doesn't matter, but, if one side is pretty and patterned and the other side is not, you would want the patterned side to be visible in the final product.
2. Take the two points at the side, marked by a pink dot in the photos above, and fold them down towards the centre corner, marked in blue.
3. Take the two pink points and fold them back towards each other.
4. Flip the petal and glue the sides together, about 1/3 of the length starting at that most pointy end. Make sure you don't glue the sides the full length. I did that with my petals at first and had trouble forming them into a flower later.
5. Flip the petal around again and push the middle fold down to give the petal a nice rounded shape.
6. Repeat steps 1-5 four more times so you have a total of five petals.
7. Repeat steps 1-5 fourteen times, but instead of gluing only 1/3 of the sides together, glue the whole length. Put these petals away for now.
8. Prepare your flower centre decoration for the smaller flower. If you're using the fake flower stamens, fold a bunch in half and then twist.
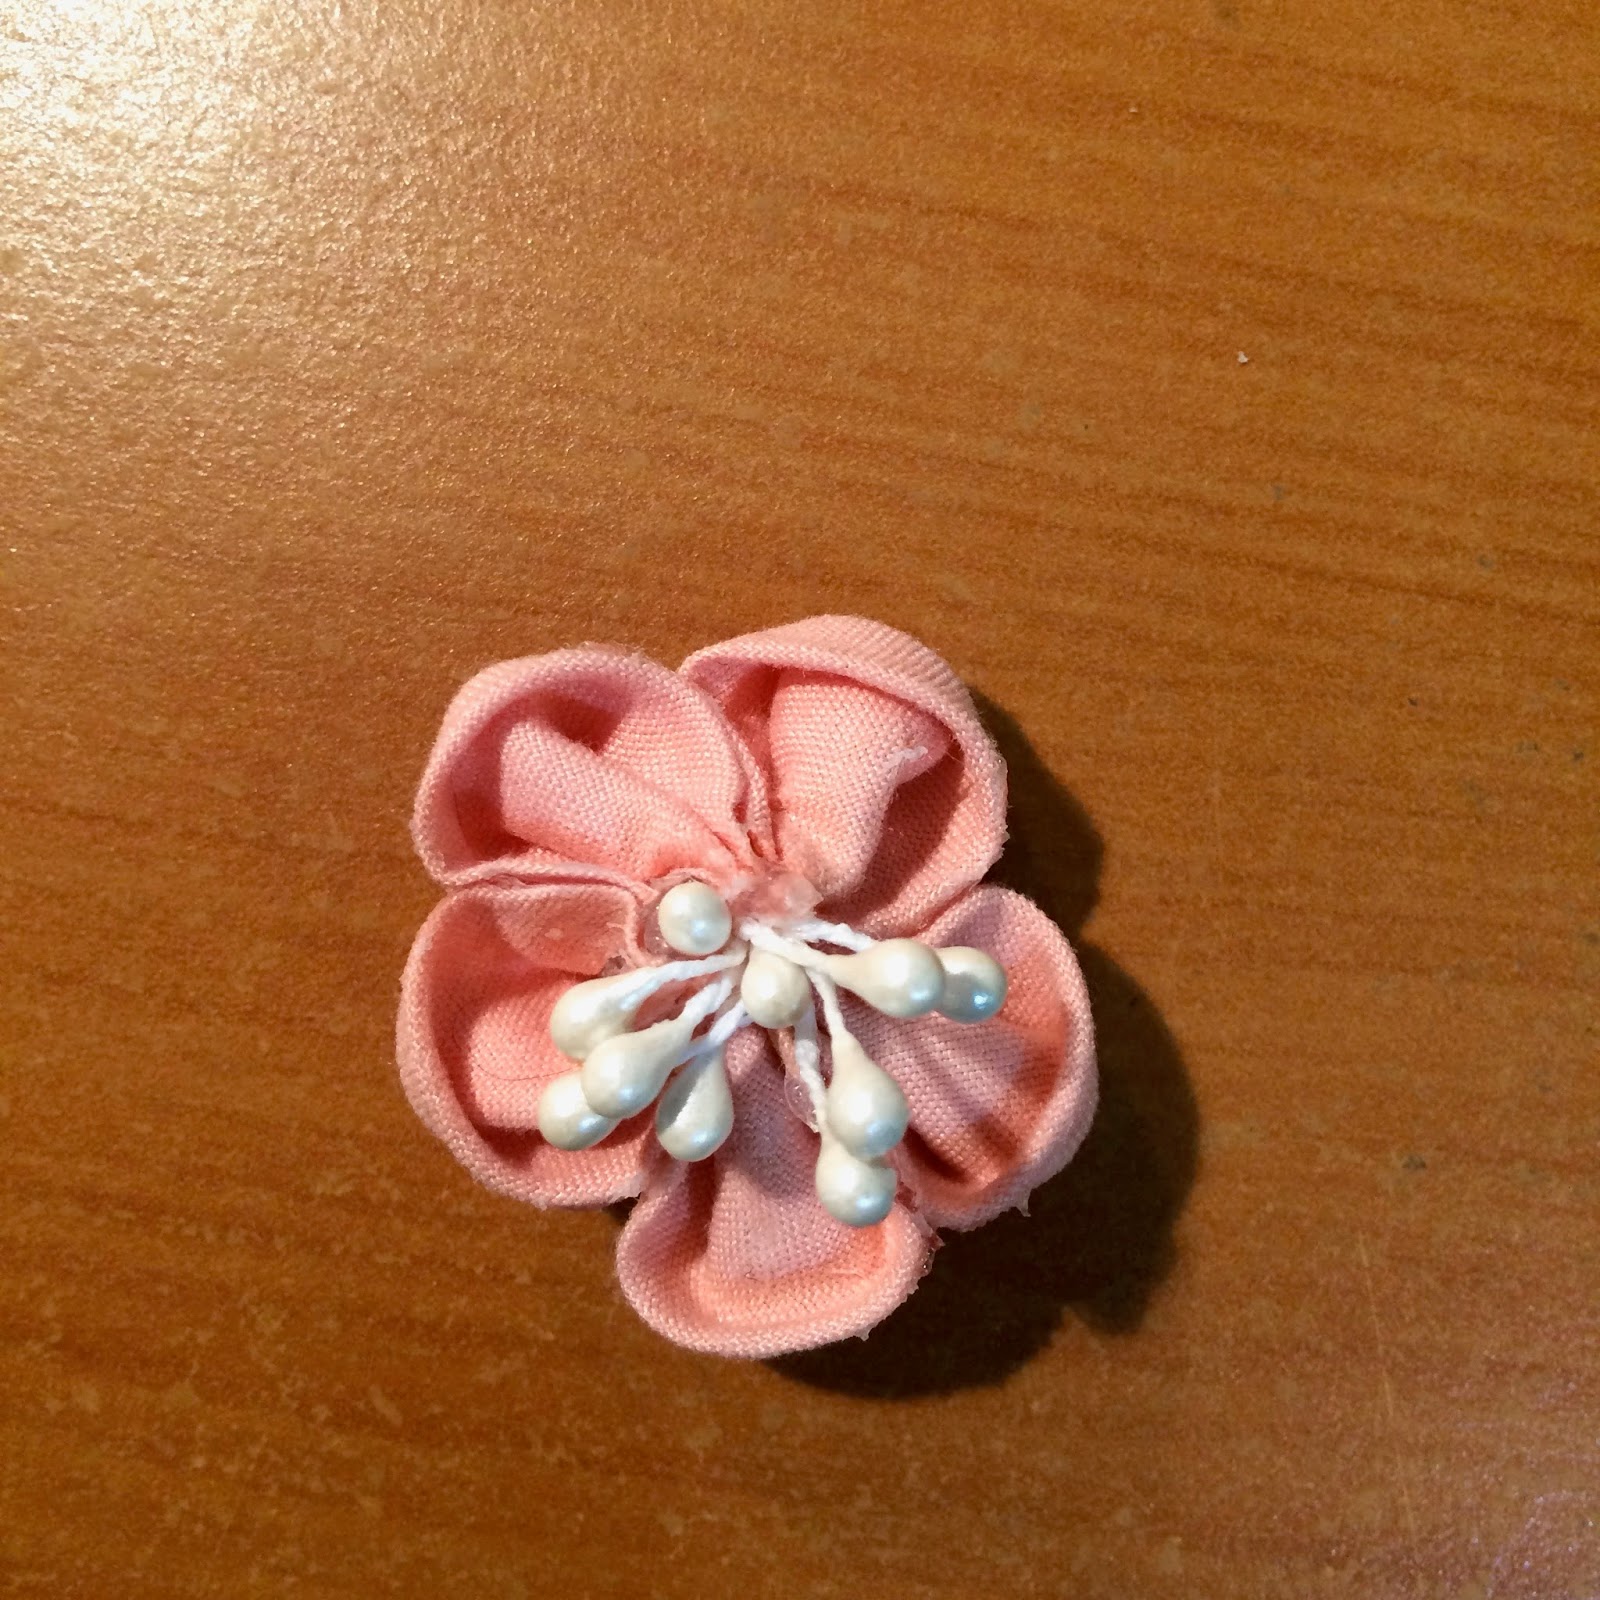
9. Take the five flower petals (the ones that were sealed only 1/3 closed with glue), put glue in lines like shown in the photo above, and stick the petals together. Before you finish this smaller kanzashi flower/ glue the last side together, place your flower centre into the middle and glue it in place.
10. Glue the last side/ close the flower. Hopefully you learned from my mistakes and made a kanzashi flower that looks much better than the one in this photo.
11. Using the same method, create five more petals with the 4cm squared fabrics. The larger kanzashi flower's petals are made of one patterned square and one white square. With the wrong side of the fabric facing up, fold the squares in half by bring one corner over to the opposite corner.
12. Place the white triangle, (or whichever fabric you want to use as the petal's inside) on top of the other. Take the triangle's point on the side and fold it down to the centre corner.
13. Take the other point and fold it down as well.
14. Fold the corners at the side back towards each other, exactly like how the small petals were made. Glue the ends together, 1/3 of the way at the bottom of the petal.
15. Make four more of these larger petals and glue them together. Use the photo above for a guide on where to put glue on. Before you glue the last petal together, glue the flower's centre in.
Kanzashi Flower Leaves
1. Make two leaves with the 3cm green squares. Start like you did with the flower petals with the wrong side up. Fold one corner over to its opposite corner.
2. Fold the triangle in half this time, bringing the pink dotted point to the blue one.
3. Fold the triangle in half again. Pink dot over to the blue.
4. Cut at the blue line, taking the bottom corner off. Close that cut with glue. I also glued the points together, in the photo that's where my fingers are holding. One leaf is done.
Kanzashi Flower Assembly
1. Almost done now! Glue the large flower onto the 3.5cm felt circle and the smaller one on the 3cm circle. Find a position for the two leaves and glue them in too.
2. Give yourself a rough idea on how you want to arrange the clip. Decide how many strands of petals you want dangling and how far apart the petals are. Cut the white string according to your arrangement plus a little extra for the ends.
3. Loop the strings around the bells and glue the ends in. Glue the petals onto the strings and the strings onto the clip. Cut any excess string sticking out from the clip.
4. If you're attaching your flowers to a clip, cover the clip with a ribbon to hide the ends of the white string. Glue the flowers on top and now the kanzashi flower clip is done!
So I hope this kanzashi flower clip walkthrough/ tutorial was alright and that it helped you. Although my smaller flower looks quite odd, I was happy with how my clip turned out overall. It could've turned out worse. Feel free to ask if you have any questions about the instructions. This was my first tutorial-kind-of-a-thing so it probably would be a bit confusing.
Share your kanzashi flower creation with me in the comments or tag me on social media 😊
Facebook: @WonderWishes
Instagram: @wonderwishes_cherrie
Until next time~
 |
| Looks great on hair <3 |